29 January 2010

pre-thanks: moroccan couscous and chard salad


So this is another dish that I made for our Pre-Thanks dinner back in November.  I made it to contrast with the other salad that I always make, because I wasn't sure if there'd be enough food for the vegetarians to eat.  There ended up being way too much of everything, but this was a tasty enough experiment that I'm glad I made it anyway.   The portions for this were huge, so feel free to adjust/halve/whatever.

Ingredients:
  • 2 cups of Moroccan couscous
  • 1 bunch of rainbow chard (which had I think maybe 12 stalks)
  • 6 baby cucumbers
  • 1 can of chickpeas
  • one handful of fresh cilantro
  • peanut oil
  • lemon juice
  • salt/pepper/garlic to taste
This ended up being a "warm" salad because of the prep involved.  The Moroccan couscous needs to be cooked a little more like pasta than regular couscous, albeit for a very short time frame.  So boil water, drop the couscous in, lower temperature to medium and simmer for maybe ten minutes.  Just keep trying it to see when its done.  

While the couscous is doing its thing, you should be chopping chopping chopping.  The cucumbers don't turn into slices on their own.  If you haven't ever cooked with chard, its is quite beautiful:

http://farm1.static.flickr.com/74/164216905_5790b1de3e.jpg
(lovely chard photo borrowed from my bay area garden)

Okay get ready for a mini-chard tutorial:

You're going to steam the chard.  First though, you separate the stalks from the leaves because the stalks take longer to steam and you don't want to leaves to be mushy.  So, position your fingers along the stalks just before where the leaves start, and you'll want to use basically a sliding motion to strip the leaves off.  It won't be a clear tear every time, but keep at it.  The stems obviously at some points are sort of insubstantial and blend into the leave, the main thing is to separate them based on how long they'll need to cook, so if they look skinny and tender, don't worry if they're with the leaves.  Put the leaves to one side and the stems to the other.  You'll then want to cut the stems into maybe two to three inch pieces and rip leaves into, say, baby spinach leaf-size pieces (trying to cut them after steaming is hilarious but not very effective). 

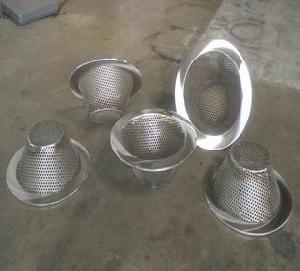
What, you don't know how to steam stuff?  Sigh.  Get the pot with the couscous.  But the couscous into the bowl with the chopped cucumbers, fill the pot back up with an inch or two of water.  Put the stove on high.  The water should boil up right quick especially if you use the eye that the couscous had been on before.  On top of the pot, put a metal strainer, like this or this.  Putting stuff in the strainer should mean that they are suspended over the boiling water but are not in it.  You can put a pot lid
on top of the strainer to hold the steam in more.

So put the stems in first, maybe 5 minutes before the leaves.  All in all, this should take 15 minutes tops, and that's really only if it takes you awhile to get the water boiling.  So now you dump in the chickpeas, chop the cilantro and drop that in, season with peanut oil & lemon & salt/pepper.

(... et voila!)

28 January 2010

easiest homemade carrot soup

Carrots: good in so many ways. Good for eyes, even better for your skin. Super low calorie but dense and full of flavors. When columnists list superfoods, I'm always shocked why this isn't one of them. I could likely write all of my posts about the ways I use carrots, but I'll start here with something i think most of you would like. Extra easy, cheap, healthy and filling. All the taste comes from roasting.


Ingredients:

- 1/2 white onion, 1 clove garlic, 4 large carrots, all roughly chopped
- 1/2 tsp each curry, nutmeg and dried parsley; pinch of salt and pepper
- 1/2 cup of low sodium vegetable broth
- 1 tbl butter
- dollop of low fat sour cream and dried parsley


Directions: preheat oven to 450F.


In baking pan, pour 1/4 c of broth, vegetables, spices and butter. Cover with aluminum foil, bake for 30 min. Pour into blender, while hot, with remaining vegetable broth and puree until smooth. Top with sour cream. Makes 2 servings.

Adding parsnips is a great way to add spice.

27 January 2010

Crock Pot Challenge: Slow Cooker Salsa Chicken


This is a slightly modified recipe from a coworker. It is my favorite crock pot recipe so far - although I am a newbie when it comes to the slow cooker. This is ridiculously easy to put together and tastes great in the end. Reheats well for leftovers!

Slow Cooker Salsa Chicken
2 lbs chicken breast (original recipe calls for boneless, skinless chicken thighs - either would be fine)
2 (16-oz) jars of your favorite salsa
1 (15-oz) can black beans, rinsed and drained
1 (11-oz) can whole kernel corn, drained
2 T chopped fresh cilantro

In 3.5 - 5 quart slow cooker, layer contents of 1 jar of salsa, chicken, corn, then 2nd jar of salsa. Cover. Cook on low for 7 hours. Stir in beans and cook for additional 30 mins to 1 hour. Enjoy alone or with rice, cous cous, pasta, etc!

Original recipe suggests browning chicken before you add it to the crock pot. I have not tried that step and it still tastes great! The picture does not do it justice :)

26 January 2010

1976 Leek Soup


My grandmother used to make this amazing potato leek soup. No one could perfect it quite like she could, so imaging my surprise when as an adult I learned that its a recipe cribbed from a thirty year old issue of Bon Appetit (Oct. 1976 to be exact). That explains all the butter and heavy cream in it. I once tried to make it a little healthier, using vegetable broth and 1% milk, and it just didn't work. This is a soup that needs to have no conscience.

Ingredients:
  • 1/2 cups minced leeks (include green stems)
  • 1/2 cup minced onion
  • 1 clove minced garlic
  • 4 tbsp butter
  • 1 qt "rich" chicken broth
  • 1 1/2 cups diced potatoes
  • 1 cup heavy cream (if you're feeling really guilty, you could get by with whole milk. A hint at the end of the recipe suggests substituting a large can of evaporated milk, so that could work too)
  • salt and white pepper


Saute leeks, onions, and garlic in butter until transparent. Add chicken broth and potatoes and bring to a boil. Cover and simmer until potatoes are tender (about 15 minutes).

Puree in blender or food processor. (An immersion blender would be super helpful here, as this fills up my entire blender and inevitably makes a mess. The recipe also suggests using a "food mill", which apparently is something that existed in the 70s.) Add cream and salt & pepper to taste. If it's too thick, add more broth or cream (because, of course, you have a lot lying around in your fridge.)

Garnish with chopped green onion and serve with toast (rye is good with this). Serve during a snowstorm, or anytime you need some excellent comfort food.

25 January 2010

Stuffed Collard Greens

Stuffed Collard Greens


Ingredients:
  • 20-26 whole collard green leaves cleaned and thick part of stalk removed
  • 1 can of your favorite beans
  • 1 8oz package of goat cheese
  • 1 cup mozzarella or jack cheese
  • 1 large or 2 small diced shallots
  • 2 cups chopped peppers
  • 2 cups mashed cauliflower
  • 2-4 Tbs fresh chopped parsley or cilantro or basil
  • 1 tsp chili powder
  • salt
  • pepper
  • 1 28oz can seasoned crushed tomatoes
Directions:
  1. Preheat oven to 350deg
  2. Boil water in a large stock pot and add collard greens. Turn heat off and let sit for 7-10 minutes.
  3. Carefully remove collards from water and lay out grouping them small medium large.
  4. In hot skillet cook the peppers, shallots, and cauliflower (if not already cooked) until they start to go limp
  5. Combine peppers, shallots, cauliflower, fresh herb, cheese, and chili powder in a bowl and mix until goat cheese has dissolved. Add salt and pepper to taste remembering that it can be added later.
  6. Lay out a large/Medium collard green and scoop a golf ball sized amount of the mixture into the center. Wrap the outside of the collard green over the mixture. Wrap that stuffed collard with a small/medium leaf making sure that the major seam from your first wrap is covered by the new leaf.
  7. Place in a medium sized baking dish.
  8. Repeat until you are out of stuffing or greens.
  9. Salt and pepper the top of the greens and cover with crushed tomatoes
  10. Cover with foil and baked for 15 minutes
  11. Remove foil and bake for 10 more minutes
  12. Remove from over and let sit for a bit
  13. Enjoy!
Commentary:
I came up with this recipe/idea on my own. I was in the market thinking about how I really wanted a stuffed shell but didn't want the pasta part and bam....it hit me! Why don't I stuff it in a collard green? The first go round was a bit of a mess! Not enough collards, too much mix, salty, but non the less tasty! I have tried making them a bunch now and this recipe is pretty much the base for a great tasting stuffed collard green. I find that keeping it simple on the inside makes it easier to pair with side dishes. It also helps those people cooking for vegetarians b/c you can always make a wonderful meat dish to serve along with the greens. I hope y'all enjoy!


24 January 2010

Simple Stir Fry


Stir fry is the quickest thing to cook when you're hungry with little culinary imagination + a load of
wilty vegetables on the cusp of death in the back of the fridge, chopped and thrown in, and sauteed lightly for the same length of time it takes to cook the accompaniment grain or noodles, and Bob's your uncle. The secret really comes in the sauce you finish it with. The dish can also be made with meat for the carnivorous consumers (chicken goes best), or for the vegetarians add grilled tofu.

Use any and all of the following, but start by fat slicing onions into quarters or eighths, sautee lightly with small nub of peeled and grated ginger, chopped garlic (2-4 cloves) and a tsp. of crushed mustard seeds, in olive oil and dollop of sesame seed oil.

Thinly-sliced carrots & turnips & courgettes & beans (string/green/snow) bell pepper(s) (red and yellow, for taste and flavor), broccoli/beets/eggplant (cut into small-ish chunks), asparagus (chopped), and anything else you've got, prepared for chopstick consumption.

Cook about 10-15 mins. I usually start low/medium heat and turn up the temp. after 10 mins. adding 1-2 cups bok choy &/o spinach &/o kale to cook for about another 5-10 mins. Water chestnuts or bean sprouts add a nice crunch, you can add alongside the leafy greens. Turn off pan & set aside to cool.

Sauce:
1/4 - 1/3 cup soy sauce (I use a wheat-free tamari sauce - I'm not normally one to plug products but San Jay makes a good low-sodium version).
Fat tblsp. peanut butter (preferably crunchy)
1 small clove finely chopped garlic
1 tsp. mustard powder
1 tsp. honey
Fresh chopped ginger (prepared as above)
Dash of pepper

Mix together all the above using a fork. Turn on high heat the veg in the pan. Add the sauce and a palm-full of nuts/seeds (pine or sesame give the nicest flavor, but almonds or peanuts work too), sautee for about 3-5 mins., still on high, until all the veg are coated and the pan begins to dry and stick.

Enjoy in combination with rice noodles, rice itself boiled fried or steamed, or quinoa.

23 January 2010

Tempeh Masala with Coconut Rice


Indian cuisine may be my favorite type of food. Ever. While I haven't yet mastered making complex Indian sauces from scratch, I did find an excellent tool to enjoy delicious Indian food at home anytime. Jyoti Indian Cuisine does come in a can, but don't let that deter you. All of their varieties are delicious; every single one I have tried has been great. Here I used their basic Masala sauce and added sauteed vegetables and marinated tempeh cubes. When paired with mildly sweet coconut rice, this is a fabulous and healthy meal.

Ingredients:

Tempeh Masala:
  • 2 tablespoons olive oil
  • 1 small-medium onion, thinly sliced
  • 2 cloves minced garlic (1 tablespoon)
  • 1 package lemon flavored tempeh-tations (unmarinated tempeh would work as well)
  • 1 cup button mushrooms, sliced
  • 1 cup cherry tomatoes, halved (about 15-20 tomatoes)
  • 1 cup frozen chopped kale (or spinach)
  • 1 can Jyoti Masala sauce


Coconut rice:
  • 1 cup brown rice
  • 1 can coconut milk
  • 1/2 cup water
To begin this meal, bring brown rice, coconut milk, and water to boil in a sauce pan. Once boiling, cover and turn heat down to the lowest setting possible. Allow the rice to steam this way while you prepare the masala dish, about 40 minutes.

In a saute pan, heat the oil on low and add the onion. Allow to cook on low for about five minutes before adding the garlic to the pan. Stir and continue to cook on low for another five minutes. Veggies should now just be slightly translucent and soft. Turn heat up to medium-high and add the tempeh. Brown on both sides, about three minutes each side. Add mushrooms, tomatoes and kale to the pan. Stir and allow everything in the pan to cook on medium high for another five minutes, stirring occasionally. If the kale is still frozen when added to the pan, it will melt and add enough liquid to prevent anything from burning in the pan. Add masala sauce to the pan, stir and bring to a boil, then turn down the heat and allow the mixture to simmer until everything is heated through and the sauce has reduced slightly, about 5-10 minutes.

Check on rice, it should be just done at this point. When finished it will be tender enough to eat but still slightly nutty with a thick sauciness coating the grains. Serve in a bowl half filled with rice and half filled with the tempeh masala. The spice and tang of the masala mixture will pair well will the mild sweetness of the rice. Enjoy!


22 January 2010

Stuffed Chicken Hotpot


This is so simple and quick on a cold night after work!

Ingredients:
  • Chicken Breasts
  • Tomatoes
  • Mozzerella
  • Baby Spinach
  • Potatoes
  • Salt, Pepper and Rosemary
  • Olive Oil


    1. Peel some potatoes and chop them in half.
    2. Cut the Chicken breasts in half, and stuff with sliced mozzerella, slices of tomato and pieces of spinach.
    3. Coat an oven dish in soe olive oil, and place the stuffed chicken breasts in a row. Place the potatoes in the dish around the chicken.
    4. Pour a little more oil over the potatoes and season the dish with salt, pepper and rosemary.
    5. Bake in the oven at 180 degrees for 45 mins.

    20 January 2010

    Workout Queen's Yummy Granola Bars


    Ever needed to grab a snack and go? Or on your way to the gym and need a healthy snack to rev you up? Grab one of these granola bars! With the help of a friend, we snagged this recipe and made it work for us. They are chewy and yummy. Try them out.

    Ingredients:
    • baking tin
    • 2 cups oat
    • 3/4 cup wheat flour
    • 4 tsp butter
    • 3/4 cup brown sugar
    • 1/2 cup honey
    • 2 tsp vanilla
    • 1 tsp cinnamon
    • 2/3 cup flaxseed
    • 1 cup crushed nuts
    • 1 cup raisins (optional)


    Procedure:
    1. Preheat oven to 375 degrees.
    2. In the baking tin, mix the flour, oats, nuts, and seeds. Then put them into the oven to toast.
    3. Meanwhile, grab a sauce pot, and mix the butter, honey, vanilla and cinnamon. Heat it on the stove till it has all dissolved.
    4. Once the oats are toasty, take them out of the oven and add the yummy heated mixture of sugar. Mix well. (Add raisins now, if you'd like.)
    5. It will turn into a goop that you can lay into a tray or pan. Flatten it out and let it cool.
    6. Cut them into bars, squares or just pick at them.
    7. ENJOY!
    This can be eaten just as is, or accompanied by yogurt or soymilk as a cereal. It really is delicious and can be kept in aluminum foil for quite a while.

    Italian Baked Chicken Conchiglioni

    Pasta is great. Pasta baked with chicken and cheese is even better. Add some spinach and you have all four food groups accounted for and a tasty meal!

    Ingredients
    • 3 cups conchiglioni pasta
    • 2 tablespoons olive oil
    • 2 chicken breasts, sliced into cubes
    • 1/2 cup diced onion
    • 1 clove garlic, minced
    • 1 (9 ounce) jar of marinara sauce
    • 2 cups shredded mozzarella
    • 1 cup baby spinach
    • 1/4 teaspoon kosher salt
    • 1/4 teaspoon freshly ground black pepper
    • 1/4 cup Italian bread crumbs
    • 1/4 cup grated Parmesan
    • 1 tablespoon butter, plus more for buttering the baking dish
    Directions
    1. Preheat the oven to 400 degrees F.
    2. Bring a medium pot of salted water to a boil over high heat.
    3. Add the pasta and cook until just tender, stirring occasionally, about 8 minutes.
    4. Drain pasta and place in a large mixing bowl.
    5. Meanwhile, put the olive oil in a medium saute pan over medium heat.
    6. Add the chicken and cook for 3 minutes.
    7. Add the onions and garlic, stirring to combine, and cook until the onions are soft and the chicken is cooked through, about 5 minutes more.
    8. Put the chicken mixture into the bowl with the cooked pasta.
    9. Add the tomato sauce, mozzarella cheese, spinach, salt, and pepper.
    10. Stir to combine.
    11. Place the mixture in a buttered 9" x 13" baking dish.
    12. In a small bowl mix together the bread crumbs and the Parmesan cheese.
    13. Sprinkle over the top of the pasta mixture.
    14. Dot the top with small bits of butter.
    15. Bake until the top is golden brown, about 30 minutes.

    19 January 2010

    Photo shoot

    Apologies that this is a bit of a write-off of a blog post, but I was cooking for 72 hours and then yesterday was up at 4:30 AM to do a photo shoot for the Veggie Burger Cookbook (this is the first—maybe second?—of many shameless plugs). The thought of writing out a recipe is nauseating, so I thought I'd be better off sharing some of the photos from yesterday. Christina Heaston is the mastermind behind the lens. You know, towards the end of the shoot I'd look at the plates I'd put together and think, oh, man, I'm getting tired and it's starting to show, and then I'd look at her photo and—how's she do that? Do you understand photography? It's something that will forever stupefy me.

    Some condiments:

    My basic hamburger bun, here with different seed toppings:

    Black-olive roasted potato salad (recipe here—and see what a good photo can do? it can make you hungry):

    Baked cauliflower burger, with pickled red onion:

    Spinach-chickpea burger (recipe here, ditto above):

    Tofu burger with beet greens and sesame glaze:

    "Pub grub" burger:

    Thai carrot burger (recipe here):

    And the baked falafel burger (another improved photo!):

    18 January 2010

    food stuff: the ultimate shelf life guide

    ever wondering how long things last? here is a fabulous guide on how long to keep things. hat tip: re-nest

    16 January 2010

    grilled zucchini spears


    So this is a quick and easy post. Zucchini spears are pretty fantasty (ha, a typo, but one that I sort of like; I'll leave it there). Also, fantastic. In any case, slice your zucchini in half long-ways twice, so each spear is one quarter of a squash. You can use summer squash for this as well, but they aren't shaped as uniformly as zucchini so its mostly a visual thing.

    Then you should come up with a marinade. Kristy and myself were in someone else's kitchen, so what we came up with was basically salt, pepper, balsamic vinegar & catalina salad dressing. Marinade in a big ziploc bag for an hour or two (we sucked the air out of the bag for a semi-vacuum seal, that may help), and then throw on the grill until you get a nice set of grill marks per the photos and you're good to go. I ate mine with a veggie burger and the others had theirs with grilled chicken.


    14 January 2010

    Lost: The Best Sweet Potato Ravioli Ever

    http://vegetarianorganicblog.com/pix/amazing_food_detective.jpg
    (ed note: i was inspired by denise's post, thus the photo. stolen from here)

    I'm not the biggest fan of the Food Network - too much repetition, basics, commercials and just terrible cooks. But there are a few things that I love and one of them is: the last 10 minutes of Iron Chef. You know, those 10 minutes where they present their full meal and describe the technique and ingredients within each dish.

    Sunday night, Mario Batali created a dish that has left me salivating for the last two days. In fact, I even dreamt of its creamy texture, just warmed yolk and delicate sauce last night. The trouble is, the recipe is no where to be found.

    From what i could see live on the show , Mario peeled and cooked down some sweet potato, added in cream, goat cheese, nutmeg, salt and pepper and placed it inside of a homemade ravioli pasta. He made a little indent and placed a perfectly fresh raw egg yolk in the center, then boiled it as usual. He shaved a few white truffles and a bit of brown butter over the top. When you cut into the center of the ravioli, the egg yolk is still runny and creates a nice sauce.

    I am determined to try this until its perfect. any tips are welcomed.

    13 January 2010

    Baking for One


    I enjoy baking, and eating what I bake, but sometimes one recipe lasts too long for me to consume, and I hate to waste tasty treats! A fun tip is to make your batter and freeze half for later. For instance, I wanted to make carrot cake the other night, but knew I wouldn't be able to eat the whole thing in a reasonable amount of time , so I made the batter for a full cake, baked half of it in a 9x9 pan, and froze the other half. Now when I am ready for the next time, I'll have the batter ready to drop in the pan. It will only take an extra few minutes or so to bake.
    Try this with cupcakes! Pour the batter in the cupcake pan, freeze the pan with the batter, then pop out the frozen batter cupcakes. Wrap and freeze... then break out when necessary!

    12 January 2010

    Creme de Menthe Brownies

    When I was a kid, my sister used to make really excellent mint brownies with creme de menthe. Since as a youngster I didn't understand that the alcohol in the liqueur bakes out, I thought this is what people meant when they said "special" or "happy brownies". I mean, they make me happy.

    All you need to do is add 1.5-2 oz of creme de menthe to your favorite brownie recipe. We used the Prescription-Strength Fudge Brownies from The Weekend Baker because you can make the whole thing in one pot (pictured), but you can find some other recipes here or here (or a box, if that's your style). Taste the batter (yes, you're allowed) until it seems almost minty enough for your taste -- the flavor will intensify when baked.

    Top with powdered sugar or green sugar crystals and serve for the holidays -- these are a perfect alternative to Christmas cookies -- or anytime.


    Ingredients:
    • 12 tbsp unsalted butter
    • 3/4 cup unsweetened cocoa powder
    • 1 1/2 cups sugar
    • 1/4 teaspoon salt
    • 2 eggs
    • 1 1/2 tsp vanilla
    • 3/4 c flour

    Melt butter in a saucepan on medium. Remove from heat and add the cocoa powder. Whisk until smooth. Add sugar and salt and whisk until blended. Add the first egg and whisk until blended (there's a lot of blending in this). Then add the vanilla and second egg and whisk some more. Sprinkle the flour over the chocolate mixture and stir with a rubber spatula.

    Pour into a lightly greased 8-in square baking dish. Bake at 350 for about 32 minutes, or until a toothpick comes out with small, gooey clumps of brownie on it.

    09 January 2010

    CROCKPOT CHALLENGE: Portuguese Chorizo and Peppers


    Ingredients:

    2 pounds chorizo sausage, casings removed and crumbled
    2 green bell peppers, seeded and chopped
    2 sweet onion, peeled and chopped
    1 6 ounce can tomato paste
    1 cup red wine
    1 cup water
    2 tablespoons crushed garlic


    In a slow cooker,
    combine the sausage, green pepper, onion, tomato paste, wine, water and crushed garlic. Stir so that everything is evenly distributed. Cover and set on low. Cook for 8 hours. Uncover the pot and cook an additional 2 hours to allow some of the liquid to evaporate. Serve over rice or with Portuguese bread. Makes 8 servings.


    Notes: Above you will find the classic recipe for Portuguese Chorizo and Peppers as I was able to find it. In my attempt at this dish, I added 1/2 jalepeno, minced, 3 carrots, peeled and sliced lengthwise into 1/2 inch long segments, 2-3 sprigs of fresh thyme, and one can of cannelini beans, drained and rinsed.


    Though the end result was indeed delicious, some observations:
    - Make sure to use a red wine that isn't too sweet or of poor quality. If you wouldn't drink it, I wouldn't use it for your cooking, because your stew will be flavored with it and the vegetables will really soak up the flavor - the carrots especially do this and I will not be adding them to my next incarnation of this dish.

    - The chorizo is surprising to work with, be prepared. I have used this sausage many times, sliced, but hadn't ever cooked a recipe that required me to crumble it. Chorizo is not formed in the same way as most sausages, where you snip the end off and squeeze out the insides. The chorizo needed to be peeled first and then crumbled. I left a few large chunks, as is my preference so that there could be variation in the texture of the stew. Please see pictures below for a demonstration of the chorizo peeling process. I saved the skins in my freezer to use in making a stock later on. Save everything for this purpose! Garlic and onion skins, vegetable ends, carrot peels, you name it!


    08 January 2010

    Chilli Prawn Noodles


    Ingredients:
    • Prawns
    • Onions
    • Mushrooms
    • Peppers
    • Chilli's or Chilli Powder
    • Ginger or Ginger Powder
    • Noodles
    • Soy Sauce
    • Fish Sauce
    • Black Pepper
    1) I used pre cooked prawns here, but if they are raw, boil or fry.
    2) Mix the prawns with the chlli and ginger powder (or fresh ones) and with some black pepper and leave aside to soak in the flavours.
    3) Heat a little oil in a pan, and chop all the vegetables: in this case mushrooms, onions and peppers. Cook gently on a low heat. Separately boil a pot of water for the noodles.
    4) Pour the prawns and spices in with the vegetable mix and cook for a few minutes, stirring frequently.
    5) At this point, cook the noodles in the pot of boiling water.
    6) When the noodles are cooked, drain and pour them in on top of the prawn and vegetable mix. Lightly stir the whole mixture and flavour to taste with soy sauce, a drop of fish sauce (I used a vegetarian one in this case!!), sesame oil etc.


      07 January 2010

      Workout Queen's One-Pan-Wonder


      Dinner couldn't be better after a workout. Especially a dinner that gives you the right amount of protein, carbs, and veggies. We like veggies....RIGHT?? Well, check out this one-pan-wonder filled with yummy ingredients that are SUPER EASY to make.

      Ingredients:
      • 150mL Turkey Sausage - comes in a package that is already ground and mixed together
      • 1/4 cup Fettucini
      • corn, carrots, zucchini, cauliflower
      • cumin
      • salt
      • garlic powder to taste
      • 1 tsp olive oil
      Procedure:
      1. Boil water and cook pasta. Set it aside.
      2. Put the olive oil in a pan and heat the stove.
      3. Add the Turkey Sausage and add the spices that you like.
      4. Once the turkey sausage is cooked, which should be quick, add veggies to the mix.
      5. As soon as the turkey sausage and veggies are cooked, add the pasta.
      6. Mix it all together. The natural oils from the turkey sausage should be like a sauce for the pasta.
      7. Serve.
      Wait....did I mention easy? Yeah...you didn't think it would be that easy. Well...some of the best and healthiest options are the ones we make ourselves. So when you're hungry and need to scrap together a few things, just whip this recipe up. And don't forget to keep up with the workout! Happy Eating!

      06 January 2010

      Challah Bread

      For Christmas, I got this adorable King Arthur Flour Dough Whisk. It's like a magic wand that whisks together flour and water and makes dough. So I decided to try making sweet and delicious challah bread. I'm not Jewish, but this bread rocks.

      Ingredients

      • 1 1/4 cups warm water
      • 1 1/2 teaspoons active dry yeast
      • 1/4 cup honey
      • 2 tablespoons vegetable oil
      • 2 eggs
      • 1 1/2 teaspoons salt
      • 4 cups all-purpose flour
      Directions
      1. In a large bowl, sprinkle yeast over warm water.
      2. Beat in honey, oil, 1 egg, and salt.
      3. Add the flour one cup at a time, beating after each addition, graduating to kneading with hands as dough thickens.
      4. Knead until smooth and elastic and no longer sticky, adding flour if needed.
      5. Cover with a damp clean cloth and let rise for 1 1/2 hours, until dough has doubled in bulk.
      6. Punch down the risen dough and turn out onto floured board.
      7. Knead for five minutes or so, adding flour as needed to keep from getting sticky.
      8. Divide into thirds and roll into long snakes about 1 1/2 inches in diameter.
      9. Pinch the ends of the three snakes together firmly and braid the three pieces together, pinching the remaining ends together like the beginning.
      10. Place finished braid on a greased a cookie tray.
      11. Cover with towel and let rise about one hour.
      12. Preheat oven to 375 degrees.
      13. Beat the remaining egg and brush a generous amount over the braid.
      14. Bake for 40 minutes. Bread should have a nice hollow sound when thumped on the bottom.
      15. Cool on a rack for at least one hour before slicing.

      05 January 2010

      Baked Falafel Veggie Burger

      They might seem like one and the same--a veggie burger and falafel--but, well, they're not. Try this traditional, no box-mix method, which involves grinding up soaked chickpeas instead of canned or home-cooked ones. It's very good, obviously, with all types of tahini sauce, as pictured in the horrifying photo above (ideally you'd put this on a bun, heh), or with an easy cucumber yogurt sauce. Don't forget the squirt of Sirracha.
      Baked Falafel Burger

      Yield: 6 burgers

      1-1/2 cup dried chickpeas, rinsed thoroughly
      3 cloves garlic
      1 onion, roughly chopped
      1 Tablespoon ground cumin
      1/4 teaspoon cayenne
      3/4 cup fresh parsley, roughly chopped
      zest of one lemon
      juice of 1/2 lemon
      1 teaspoon salt
      1/2 teaspoon freshly ground black pepper
      1/2 teaspoon baking soda

      Preheat oven to 400° F.

      Cover the beans by 4 or 5 inches with water in a bowl and let rest for 24 hours. Drain thoroughly.

      Place the beans and all remaining ingredients in a food processor. Pulse until coarsely combined. If the mixture is struggling to come together, add a bit of water, but no more than 2 Tablespoons. The mixture will fall apart when cooking if there’s too much liquid. If water was added, stir in 1 Tablespoon of chickpea flour or all purpose flour. Adjust seasonings, and shape into 6 patties (it will be a fairly wet mixture).

      Place the burgers on a liberally oiled baking sheet. Bake for 15-20 minutes, flipping them once halfway through, until golden and firm.

      04 January 2010

      kit kat: what do I do with real vanilla??

      Help!

      Greetings fellow mad tastiers… I am in desperate need of some help to create my own mad tasty food. Let me explain…

      Ever since I was about 14 years old and I read an article in Cosmo magazine where they said that every woman (even though I was just a girl at the time) should have a “signature scent,” I have been wearing a type of vanilla perfume or body spray. It is, now, my signature scent. I love vanilla everything. Vanilla smells – perfume, candles. Vanilla food – ice cream, the flavored tootsie rolls with the blue wrappers. Everything. Except vanilla vodka, which I USED to love, but thanks to one fateful night on the town the summer between freshman and sophomore years of college, I can no longer drink it.

      So vanilla is the thing for me. And as a special treat as part of my Christmas gift, my dear friend, Elaine in London, sent me a vial of real vanilla from Madagascar. And I was overjoyed – I’ve never actually seen REAL vanilla. And it’s awesome. But … I have NO IDEA what to do with it. So I am reaching out to you all, dear friends, to help me come up with a dish or a reason to use it. Any tips on cooking with real vanilla? Dishes that are your favorite? What else should I know? I assume I don’t just rub it on my wrists and wear it…

      LinkWithin

      LinkWithin Related Stories Widget for Blogs